How To Create Group In Tally
How to Create Group in Tally ERP 9
In this section, we are going to learn how to create a group in Tally. We will also see how to alter and display created groups.
If we are creating groups in Tally for the first time, it is recommended to enable the following things:
- Allow advanced entries in Master
- Provide advanced information in masters
Use the following path to create groups in Tally
Gateway of Tally → F12: Configure → Accts/ Inventory Info → Accounts
How to Create Groups in Tally
In Tally ERP 9, maintain the following Sundry Debtors Ledgers Accounts:
Main Group: North India Debtors Group and South India Debtors Group under Sundry Debtors
Sub-Group: Tech solutions grouped and ABC limited under North India Debtors. Hyderabad Debtors, Bangalore debtors, Vijayawada debtors under South India Debtors.
Step 1: In this step, go to the Gateway of Tally and then click on Accounts Info.
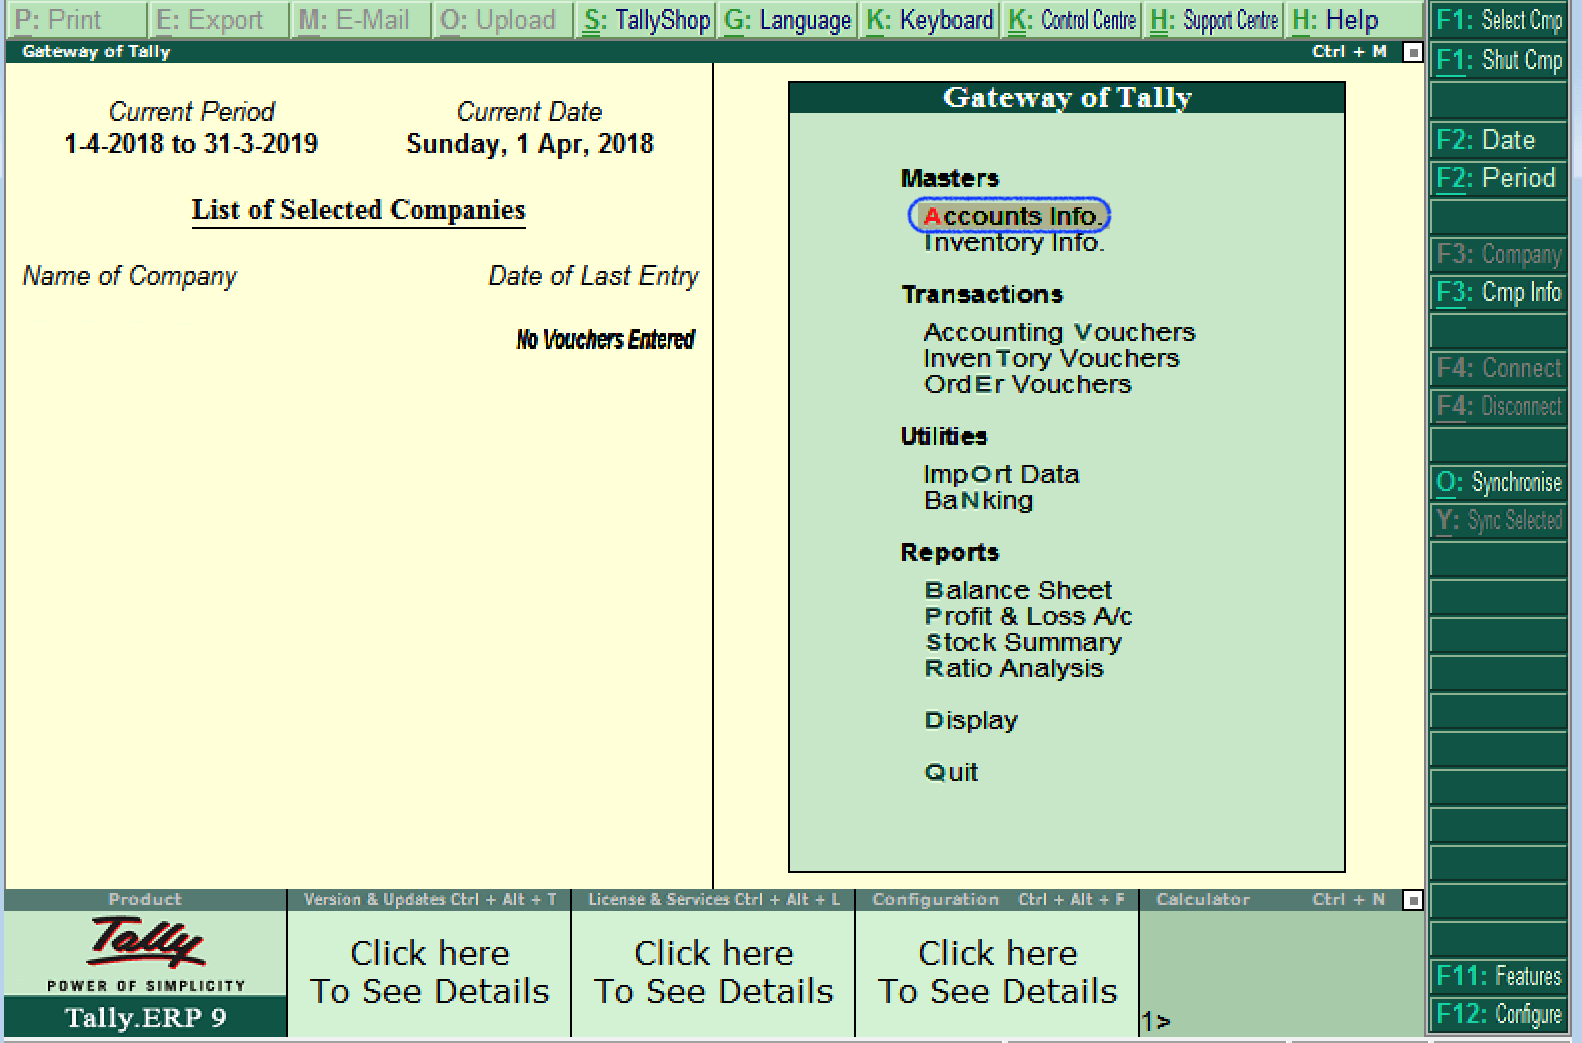
Step 2: Choose the option Groups under Accounts Info.
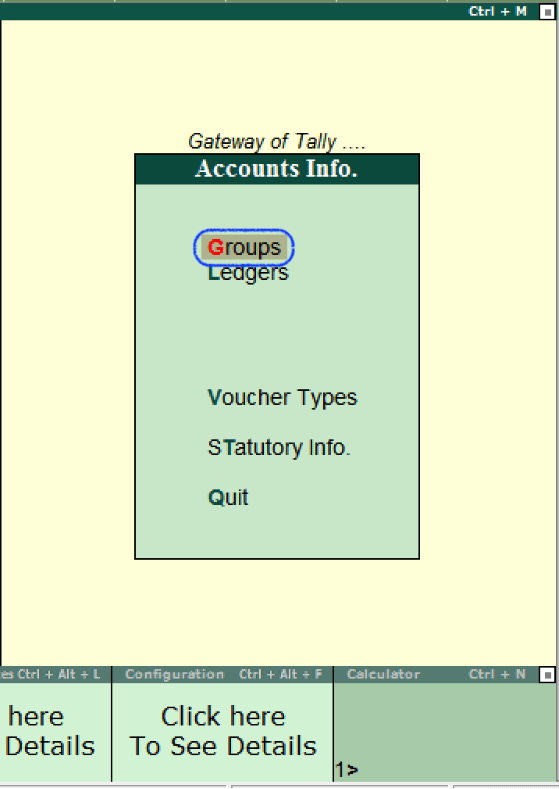
Step 3: In Tally ERP 9, choose the option Create under Single Group Menu to create a single group.
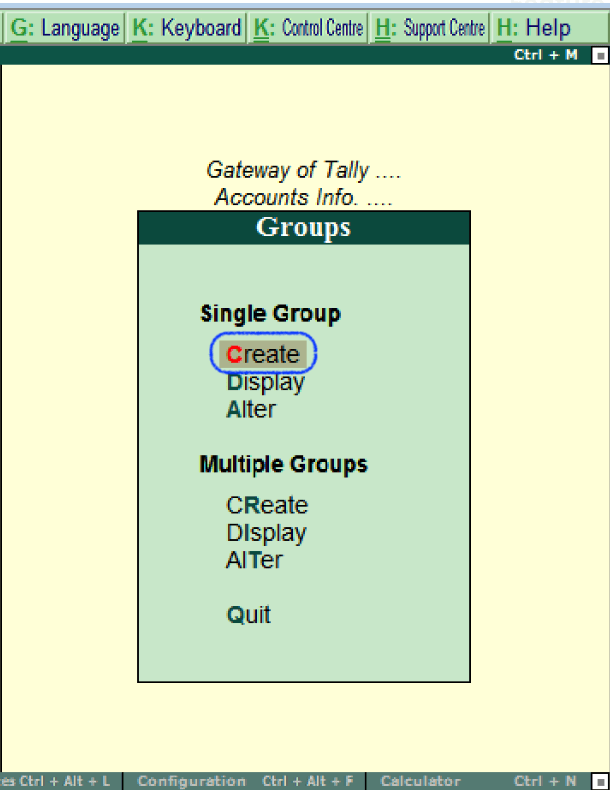
Step 4: Update the following details on the Group creation screen:
Name: Specify the name of the group and then press enter to continue.
Under: Under List of Groups, choose the group name as Sundry debtors.
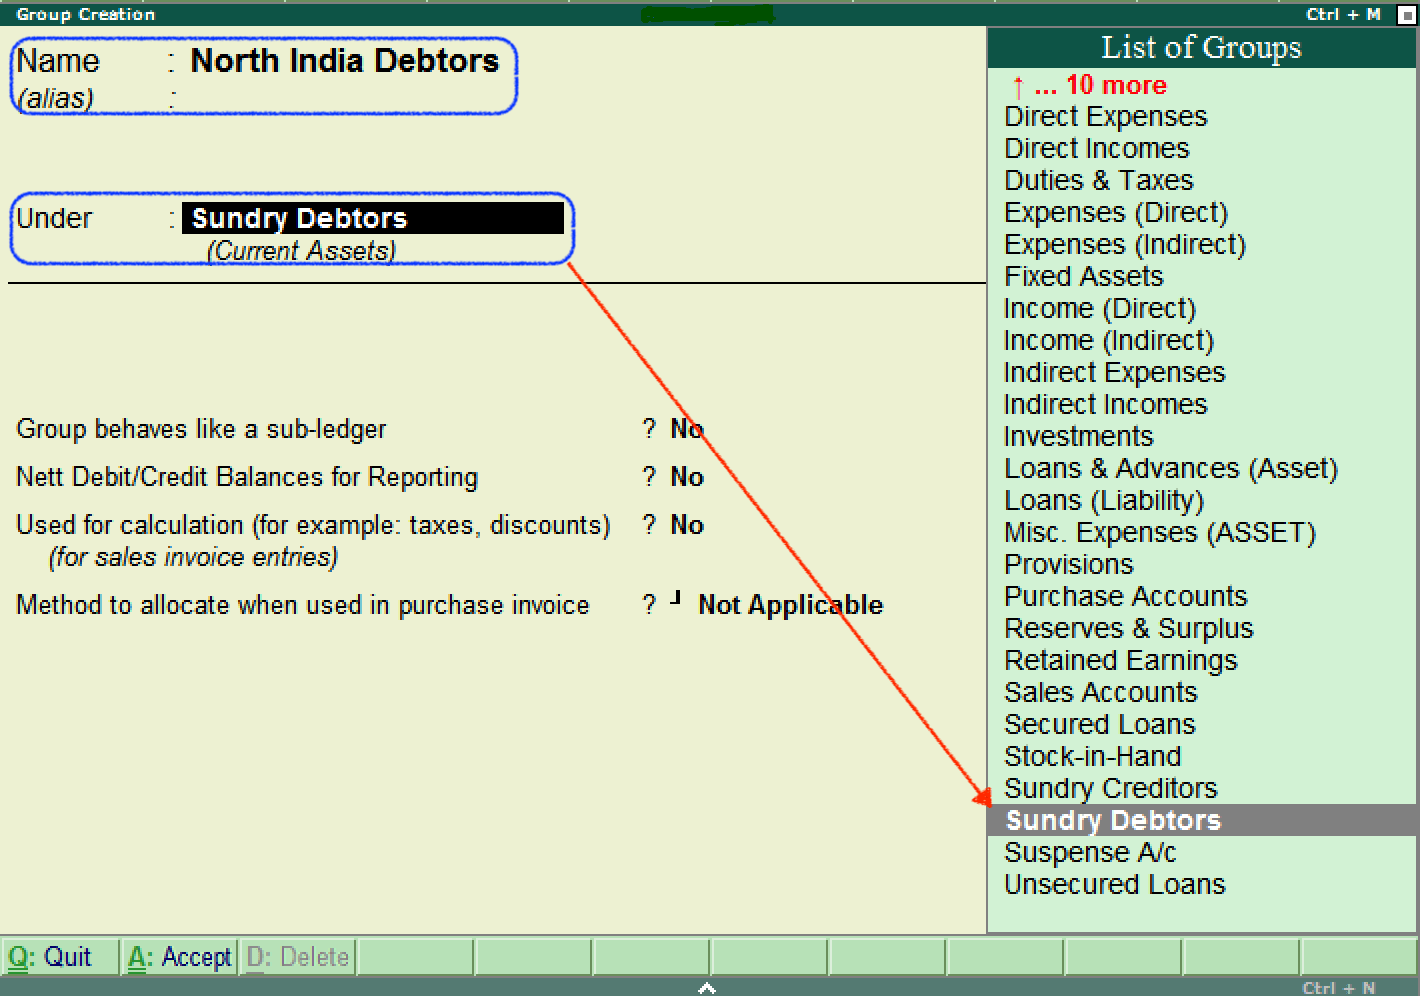
After entering the required details, press Ctrl+A: Accept or press enter to save the details.
Also, create other Groups using the above procedure
- South India debtors under Sundry Debtors
- Hyderabad Debtors, Bangalore debtors, and Vijayawada debtors under South India Debtors.
- Tech Solutions or ABC limited under Bangalore Debtors.
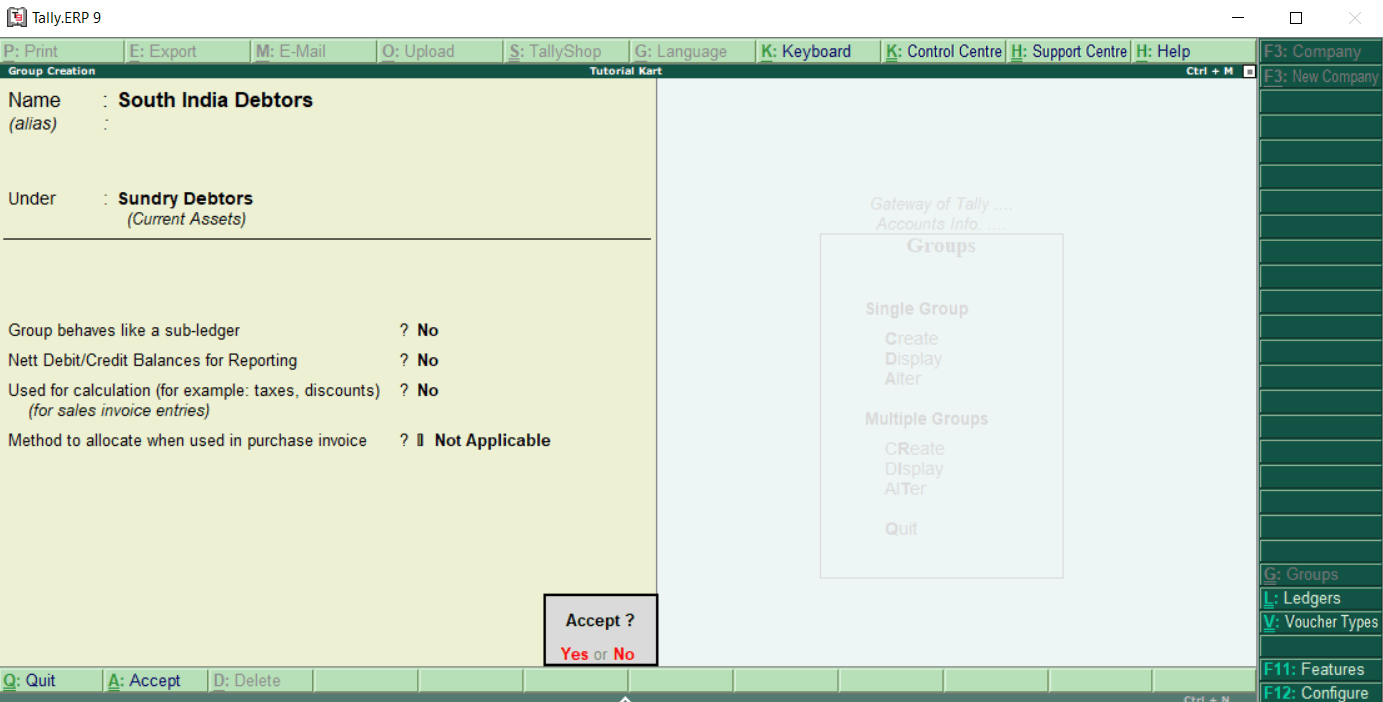
Tally is used to create any number of groups under all default groups. Here we have created two groups under Sundry i.e., North India Debtors and South India Debtors. Under South India Debtors, three sub-groups (Hyderabad Debtors, Bangalore debtors, Vijayawada debtors) created.
How to Display Group in Tally
In Tally ERP 9, after creating the group, we can display all the created groups in detail. However, users are not allowed to edit/alter the data in display mode.
Step 1: Use the following path to display groups in Tally
Gateway of Tally → Accounts Info → Groups
Step 2: Under Single Group, click on the option display to display groups in Tally.
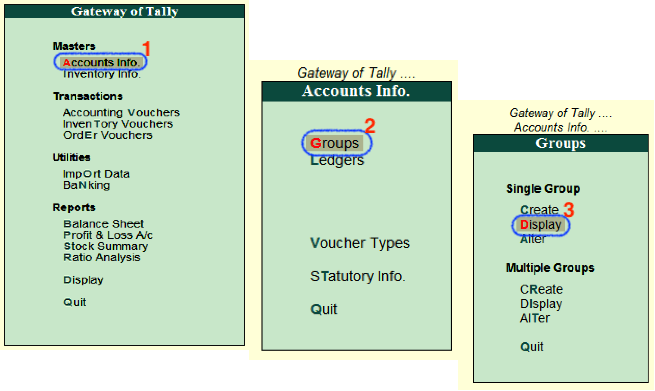
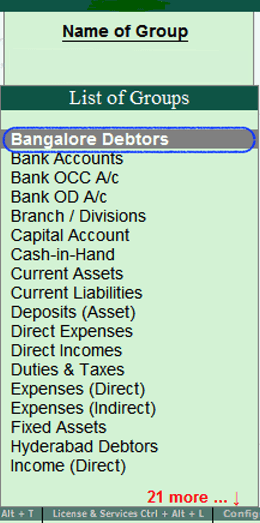
Step 3: Choose the required group name under List of Groups name and then click on that particular group to display on the screen as follows:
Step 4: Now the ledger (Bangalore Debtors) display on the screen as:
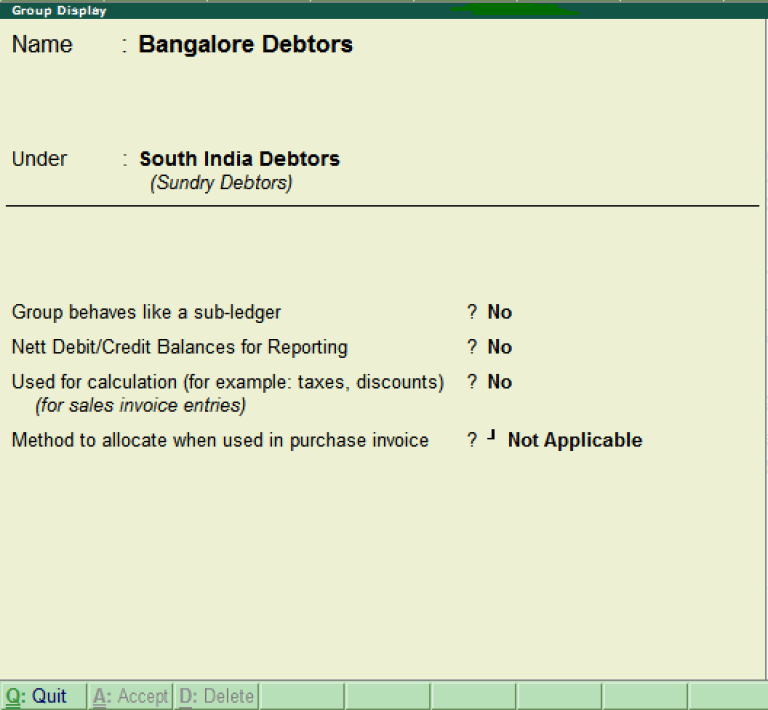
Step 5: To close the screen, click on Q: Quit.
How to Alter Group in Tally ERP 9
In Tally ERP 9 application, after creating the group, we can alter the details as per the requirements. Refer the following steps to modify/alter group in Tally:
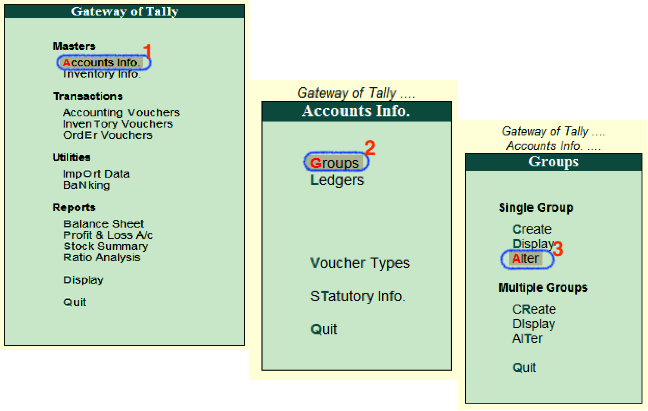
Step 1: Use the following path to alter groups in Tally
Gateway of Tally → Accounts Info →Groups
Step 2: Click on Alter option under Single Group.
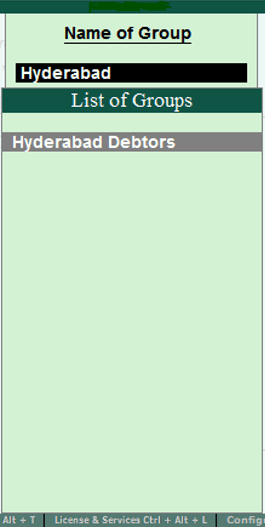
Step 3: From the given search field, we can search the group and then click on that group name to modify the details.
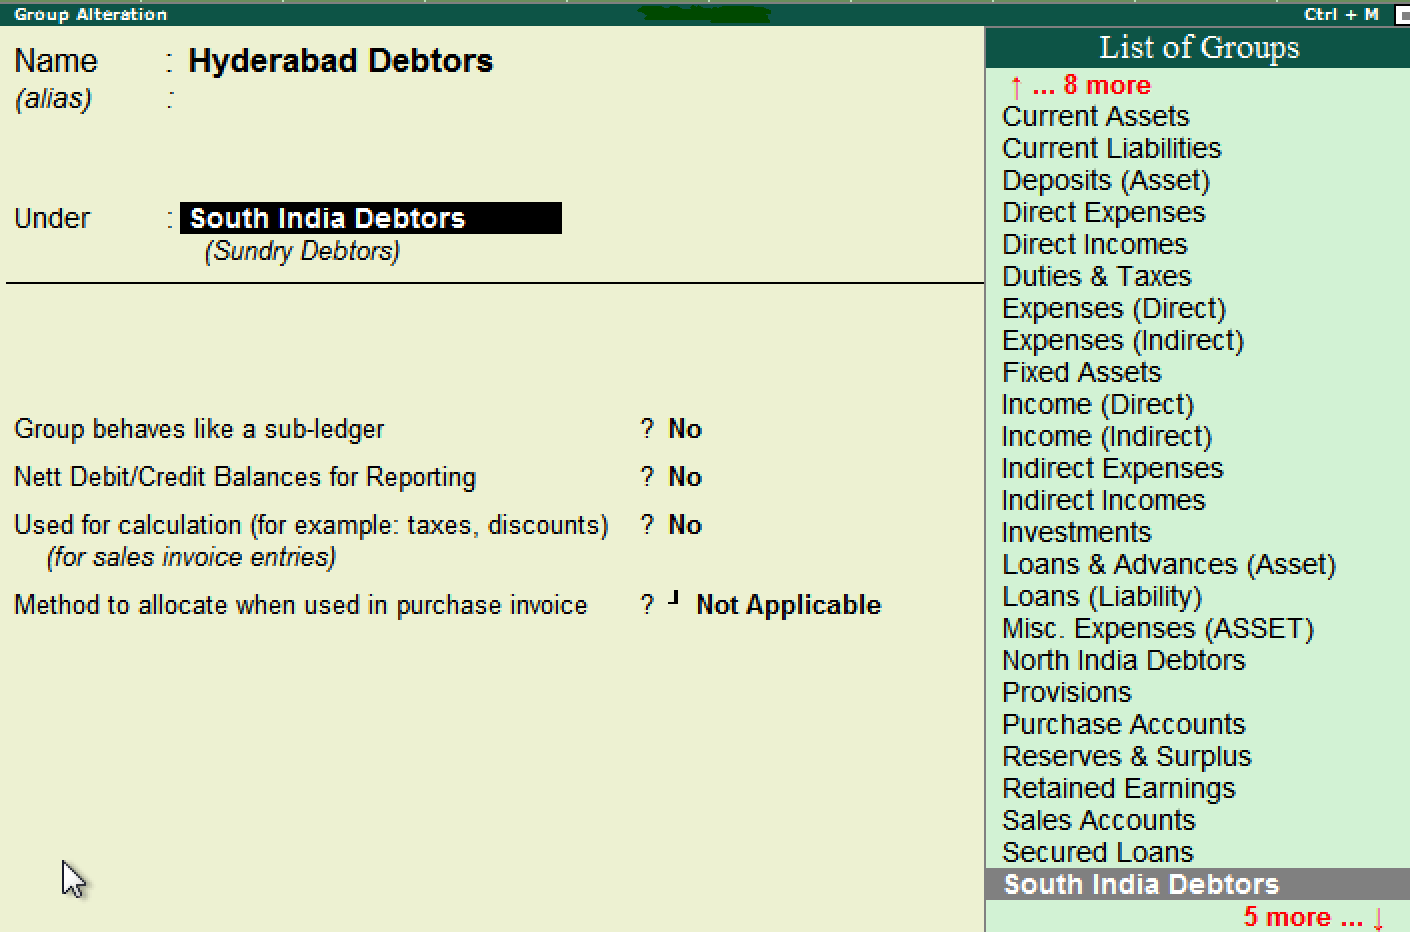
Step 4: Update the required details on the Group Alteration screen and then click on A: Accept to save the details.
How To Create Group In Tally
Source: https://www.javatpoint.com/how-to-create-group-in-tally-erp-9
Posted by: smithgert1936.blogspot.com

0 Response to "How To Create Group In Tally"
Post a Comment