

How To Create An Accent
We built this accent wall our guest bedroom so I thought I'd share how we did it along with some tips & tricks. I love accent walls and have wanted to do them ever since we first designed this house but I couldn't decide which pattern to do on this wall — a grid, herringbone, random pattern, board & batten, etc so I drew up over a dozen different design variations before deciding on this one. It took us one night to put up the boards, another night to fill the holes and sand, then another night to paint it.
Note: these instructions can be used for any pattern of wall paneling – they are not specific to my particular paneling design. So, no matter what type of paneling you want to do (squares, straight board and batten, herringbone, something completely different) the basic "how-to" instructions are the same.
PANELING SUPPLIES:
- Pre-primed boards: Home Depot (you can use any size you want but this is what we went with)
- Miter saw: Home Depot | Amazon (to cut the boards)
- Carpenter's square: Home Depot | Amazon (to draw straight lines where to saw the boards)
- Nail gun (+ nails): Home Depot | Amazon (to attach boards to the wall)
- Paneling adhesive: Home Depot (to attach boards to the wall)
- Measuring tape: Home Depot | Amazon (I hope this one is self-explanatory)
- Painter's tape: Home Depot | Amazon (if you're using 1x2s like I did, then I suggest getting ~1.5″ painter's tape as it is close to the size of the 1x2s and you can use it for templating)
FINISHING SUPPLIES:
- Caulk: Home Depot | Amazon (to fill in seams after installation)
- Caulk gun: Home Depot (for your adhesive and caulk)
- Wood filler: Home Depot | Amazon (to fill in nail holes)
- Putty knife: Home Depot | Amazon (to apply wood filler to nail holes)
- Sandpaper: Home Depot | Amazon (to sand wood filler after nail holes are filled)
PAINTING SUPPLIES:
- Microfiber roller: Home Depot (though I got a kit like this one: Home Depot)
- Angled paint brush: Home Depot
- Paint: I chose BM Classic Gray in satin, but you can do any color you like
INSTRUCTIONS:
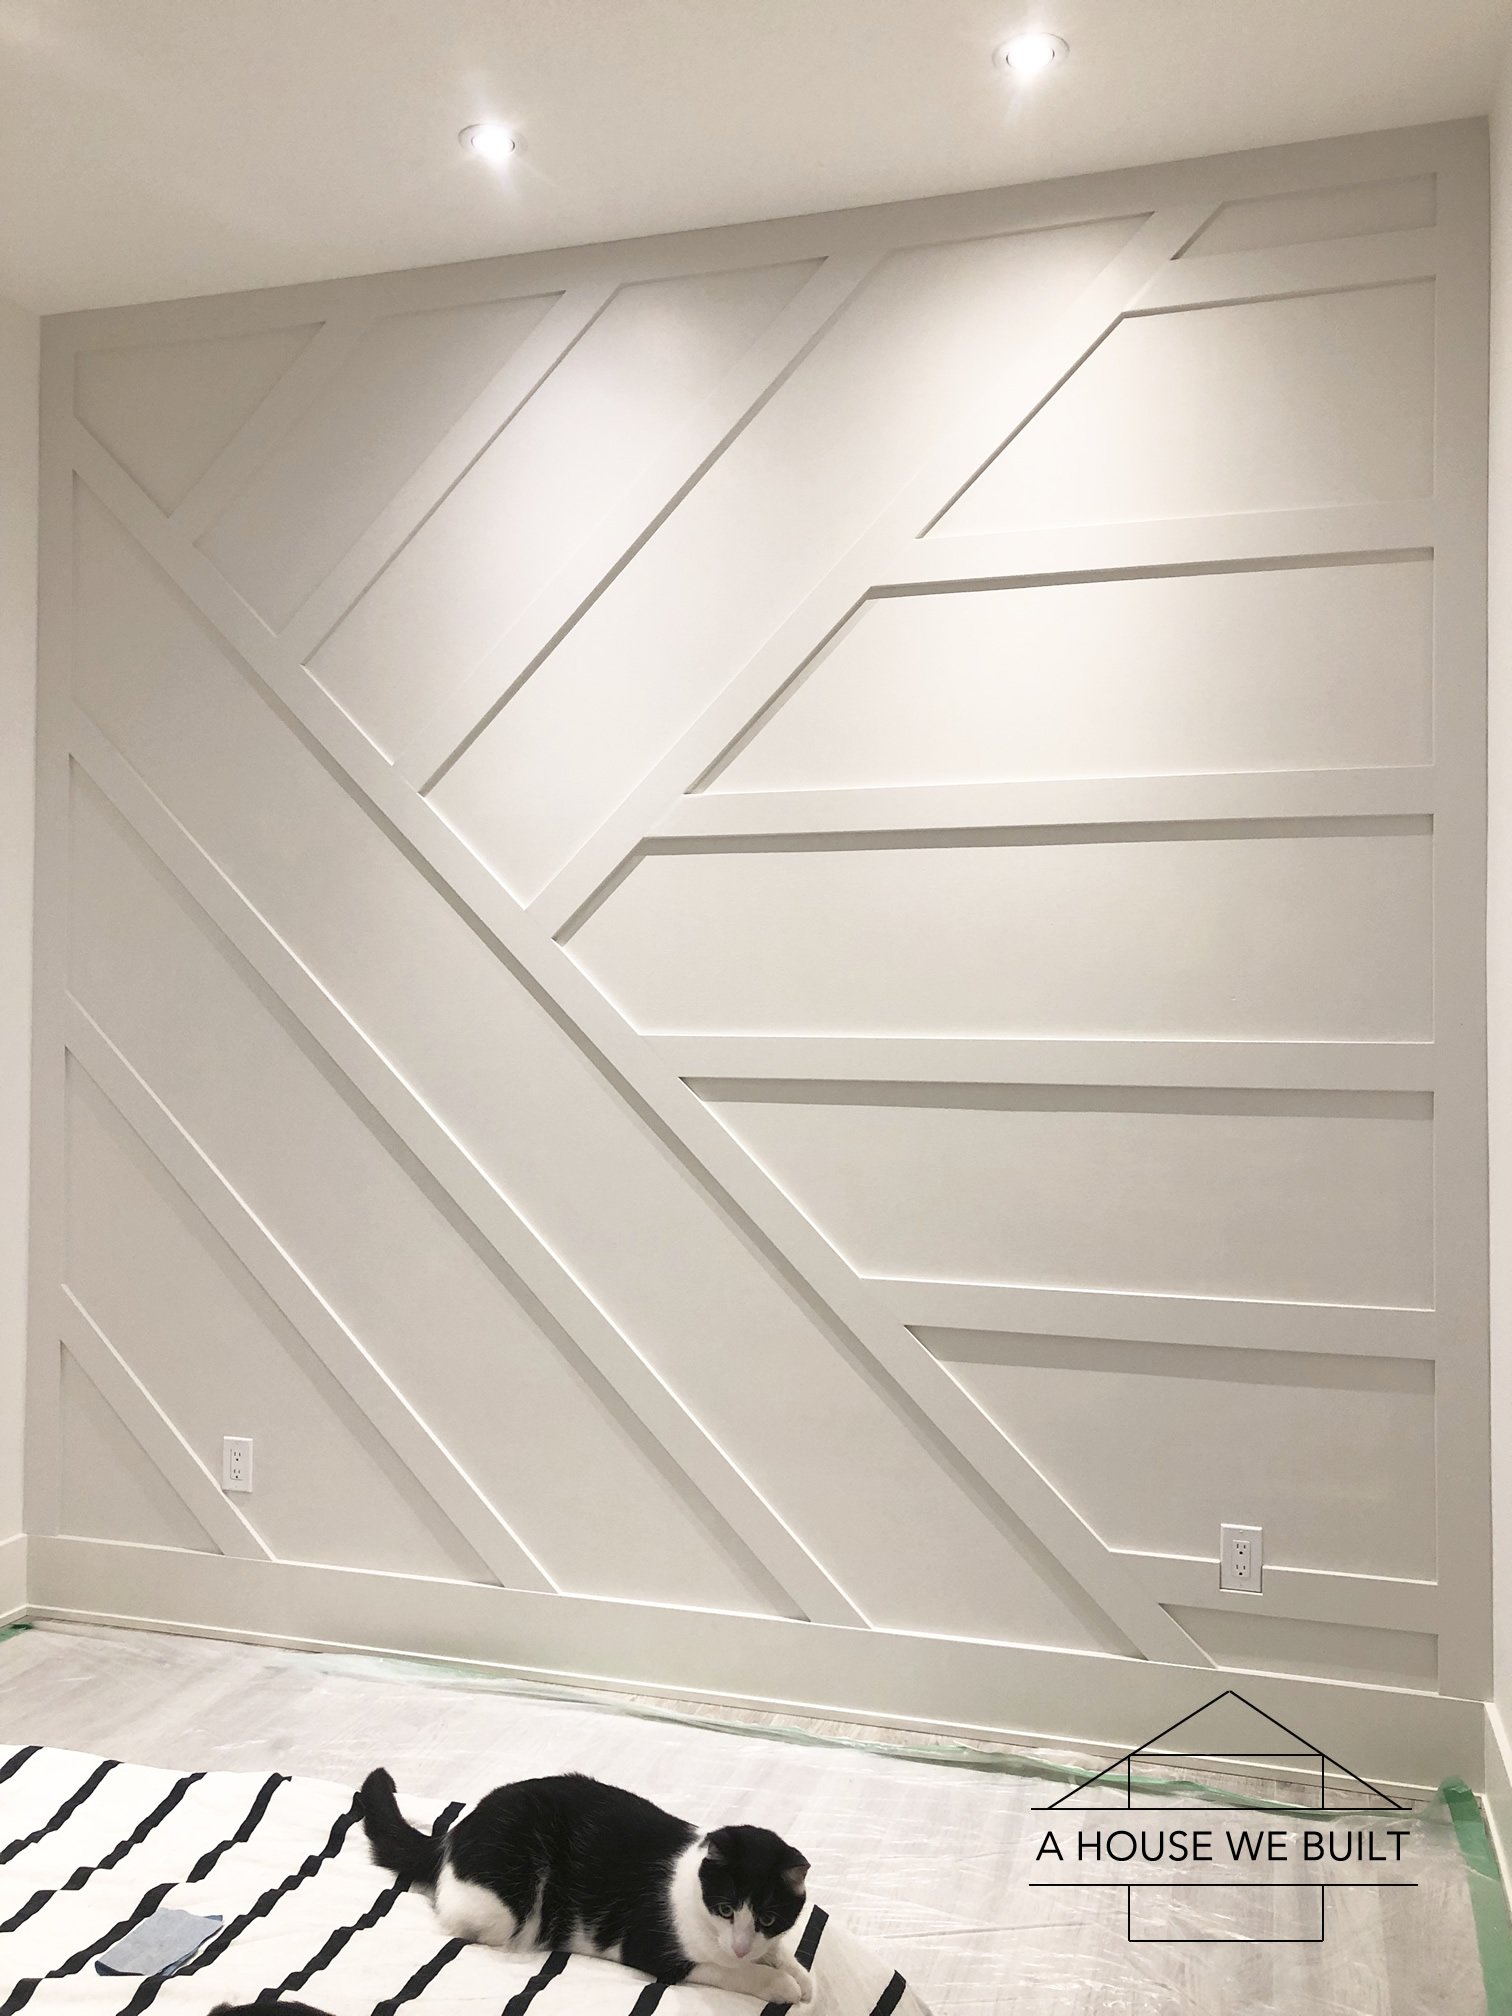
- Design. My goal was to design a wall with a distinct but simple pattern that could work well with different room configurations. I came up with about a dozen variations and this one was my favorite.
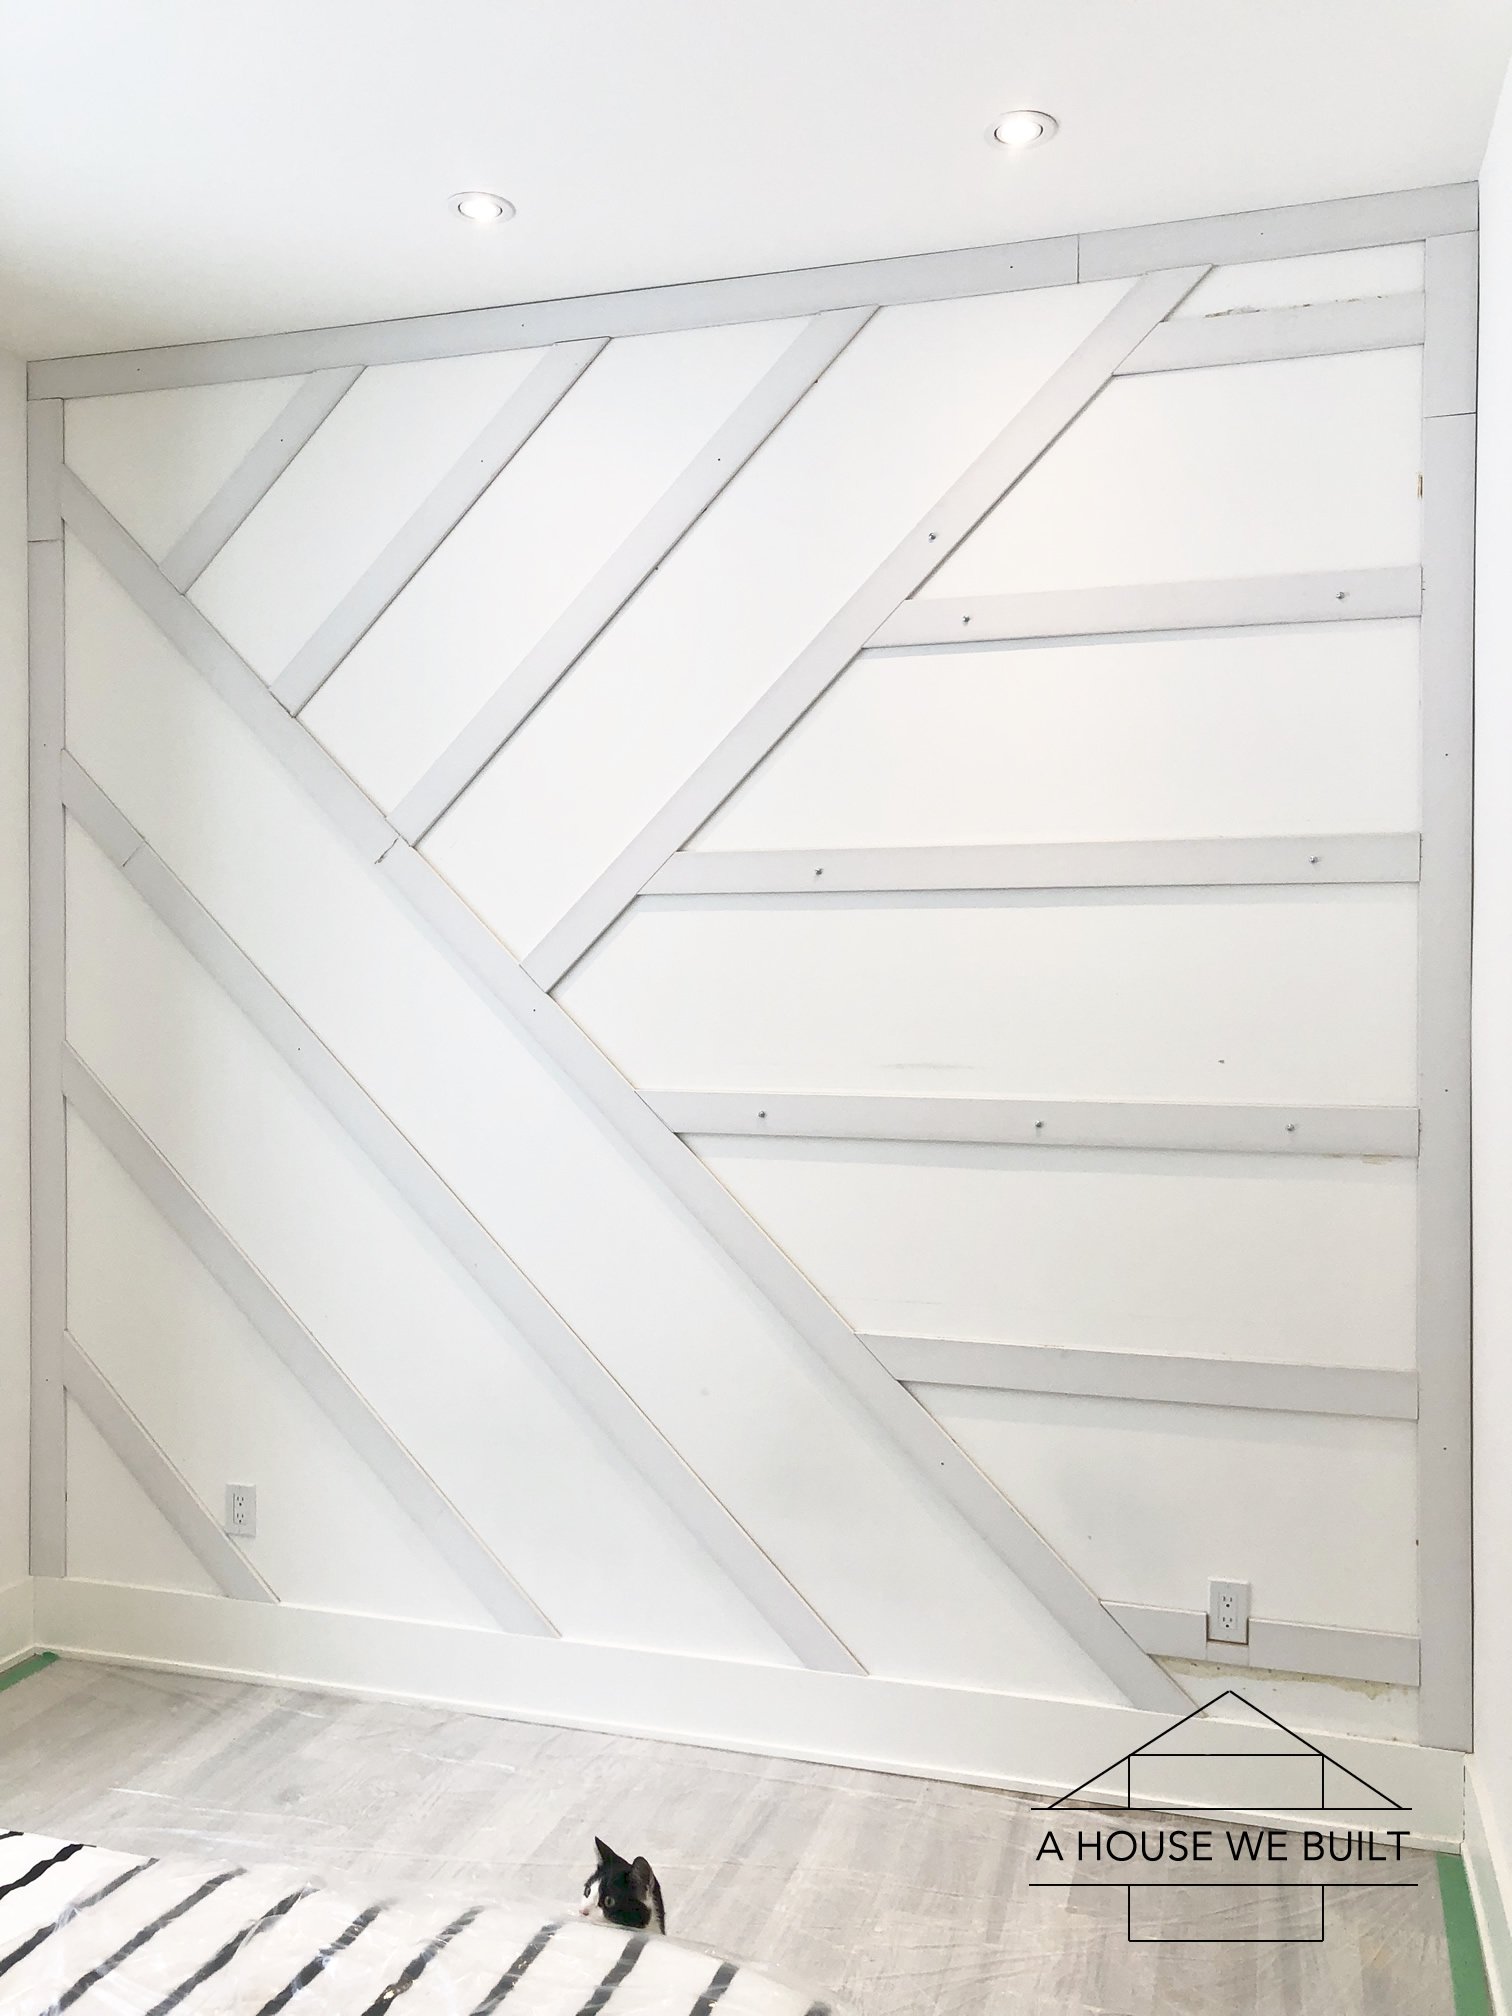
- Plan your wall. This was the hardest part. It involves a lot of math and patience. We decided to start with out perimeter trim first. Then the longest diagonal on the left next and worked down from there. Then the upper diagonal section (starting with the longest piece first). And finally we ended with the horizontal pieces on the right (where we also had to work around an outlet).
- Cut boards and attach them to the wall. Use a line of construction adhesive on the backs of the boards AND some kind of fastener (either screws or nails, depending on how you want to do it). Start with the perimeter and then strategically work through your pattern. Cut as you go so that you can adjust any measurements needed along the way. (Note: Our accent wall was on an exterior wall and we didn't want any penetrations in our vapor barrier so we didn't want to nail/screw the boards to studs so we came up with a creative solution where we predrilled holes in our boards and found screws that were less than the thickness of the board + drywall. After applying the adhesive, we then screwed the boards into place for about a day to dry, then removed the screws and filled the holes. This way our exterior wall assembly remained completely in tact.)
- Sand down anything uneven with a heavier sandpaper.
- Fill all nail holes and joins between boards with wood filler using a putty knife.
- Caulk every place were the board meets the wall by running a line of caulk down each join, then run your finger over it to smooth it out. Have a damp towel on hand to wipe your finger.
- Sand everything you used wood filler on. You have to get this pretty smooth or it will show through once you've painted it.
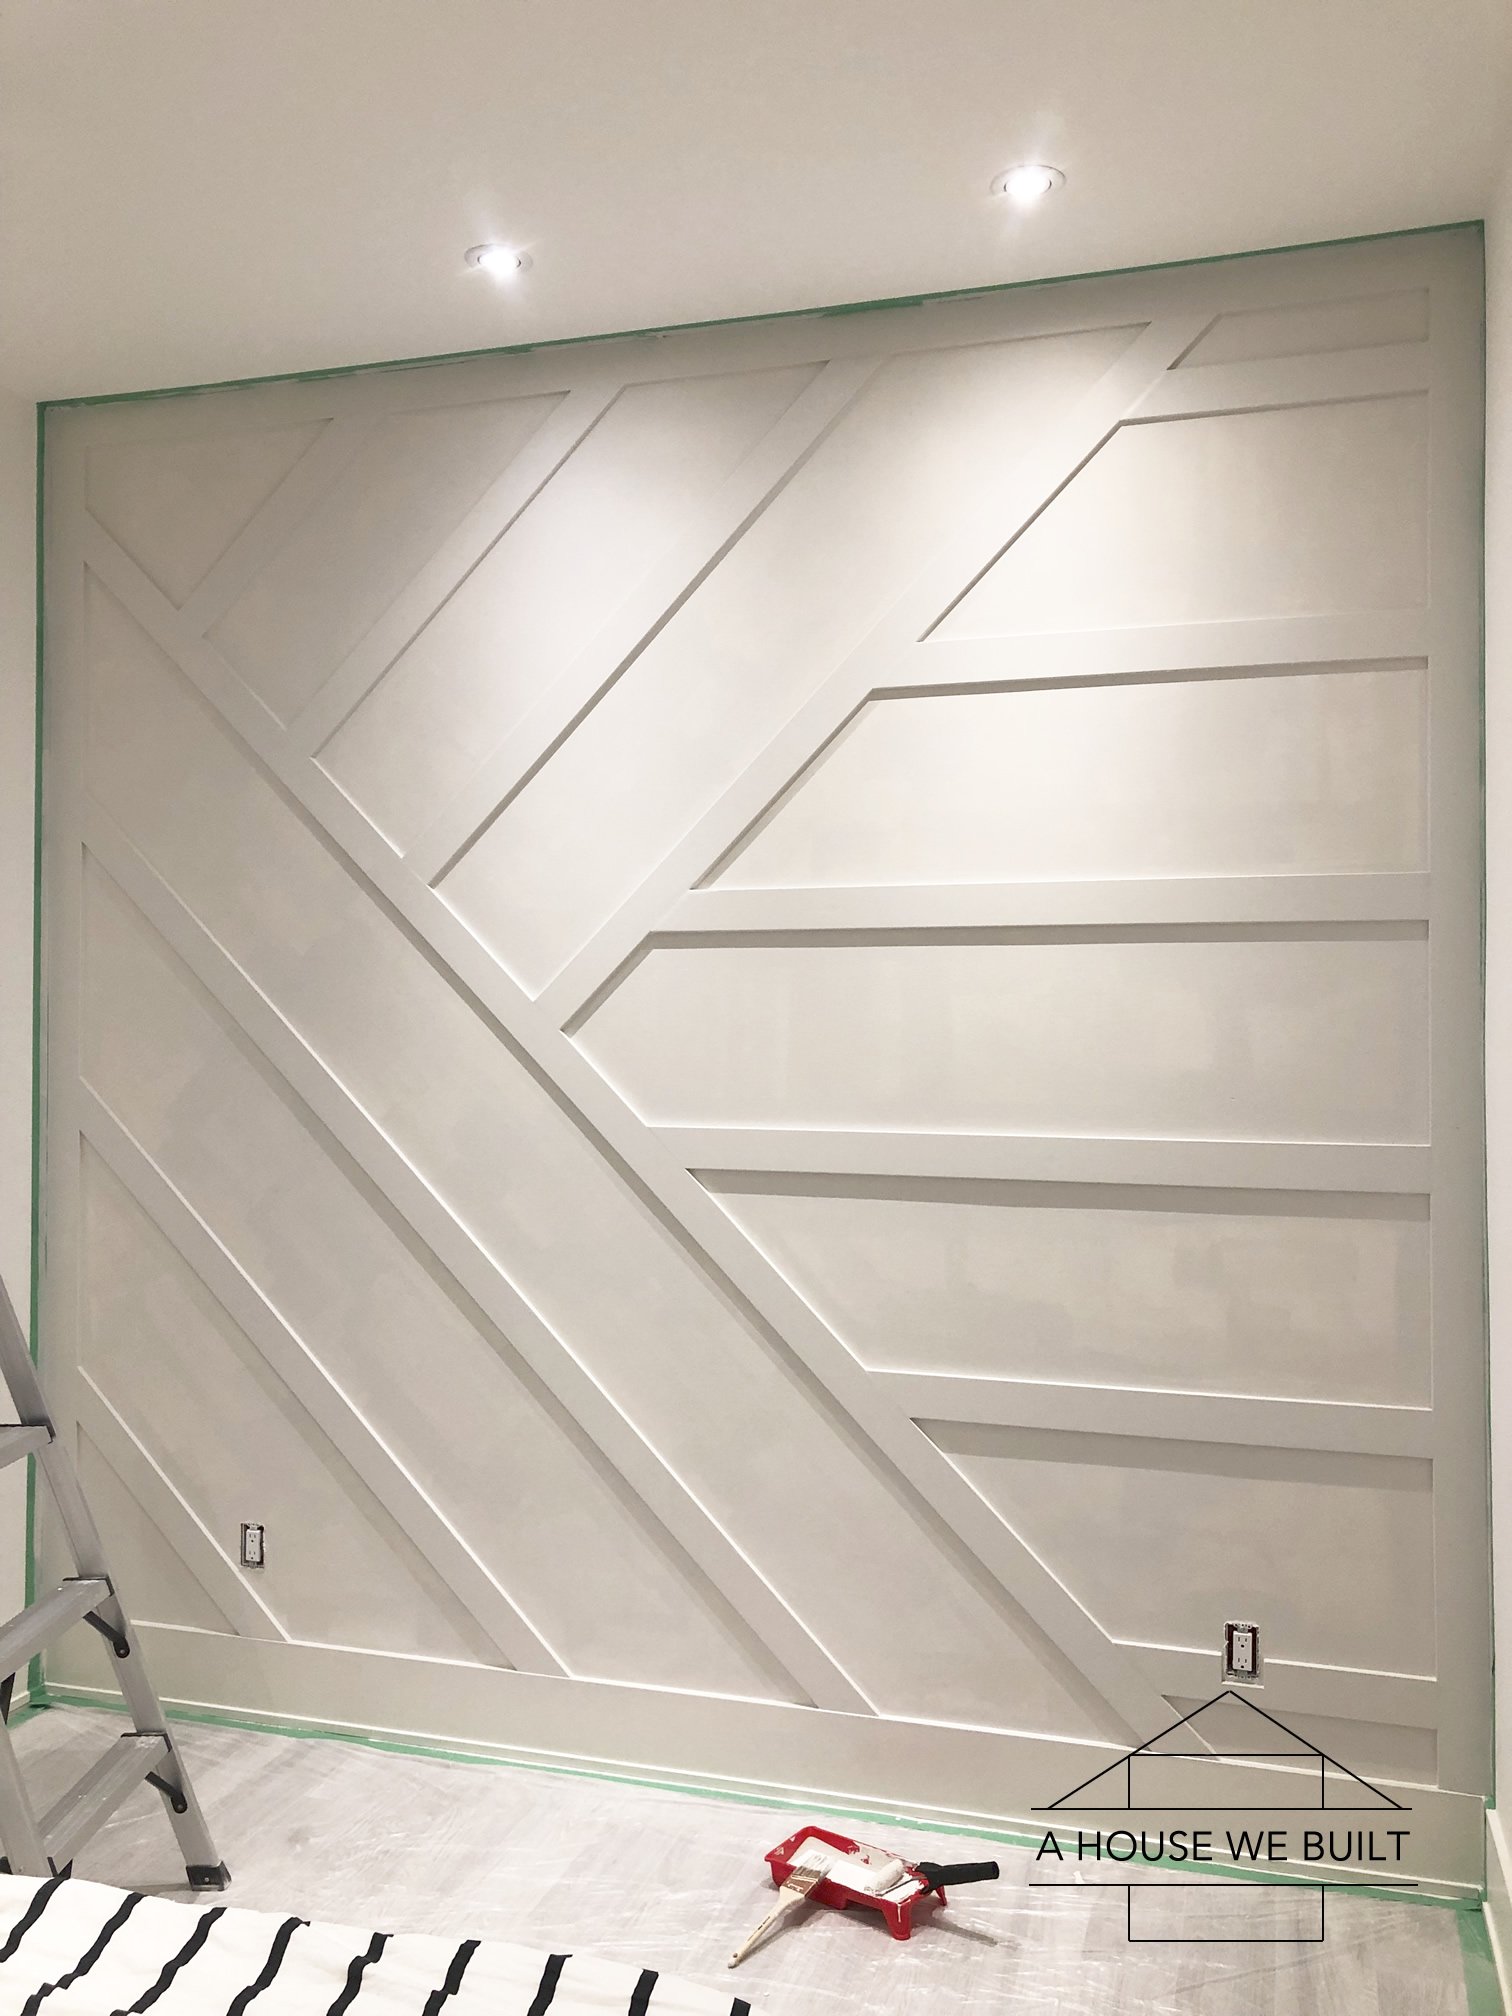
- Paint. Be sure to either use primed boards or prime before painting. I used an angled paint brush for the edges first, then a microfiber roller for all the boards and drywall.
RANDOM THOUGHTS:
- If you're kinda thinking this all sounds a bit too hard I recommend trying a board & batten look or a simple grid wall since it'll all be 90 angle cuts and should generally be easier to tackle.
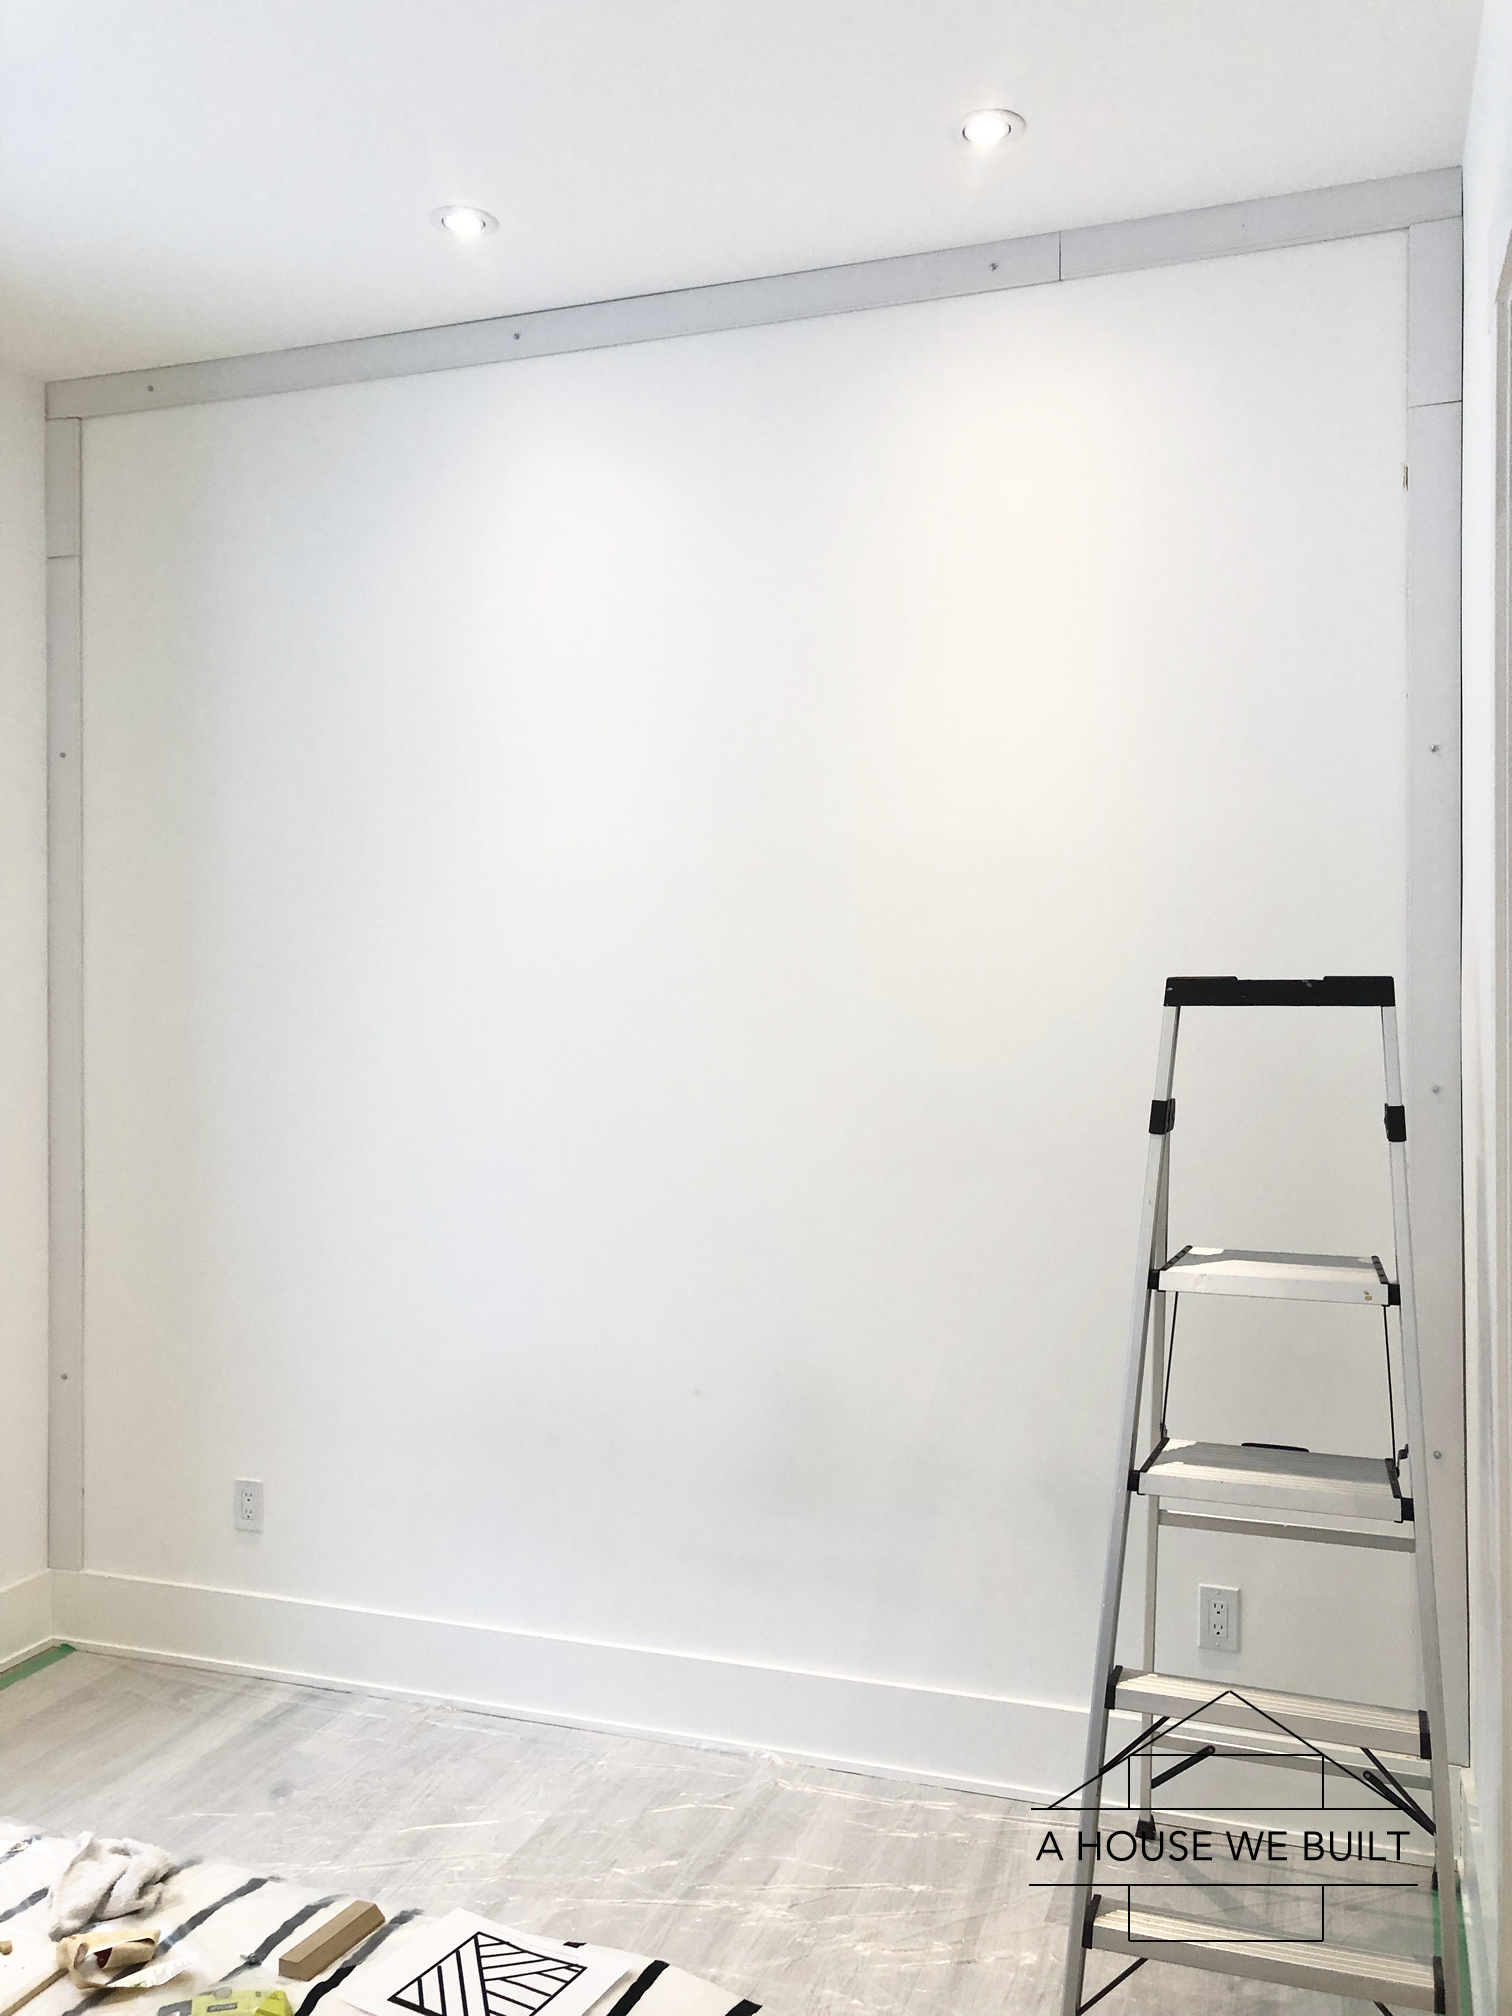
- Paint the wall first if you can. I mean, why not?? I didn't because at the time we started putting up the boards I still hadn't decided on my final color. But it would have made painting sooooo much faster to at least have the first coat on the wall done.
- I highly recommend trying to work "around" outlets etc instead of incorporating them into the design. It's just easier. Personally I'm not a fan of trimming them out as it just draws even more attention to them. In our case, we unfortunately couldn't go around one of our outlets so I kind of got creative around it but in a perfect world, we would have just avoided it. I wasn't too worried about ours though since eventually it'll be behind furniture anyway so it's not like it would be visible.
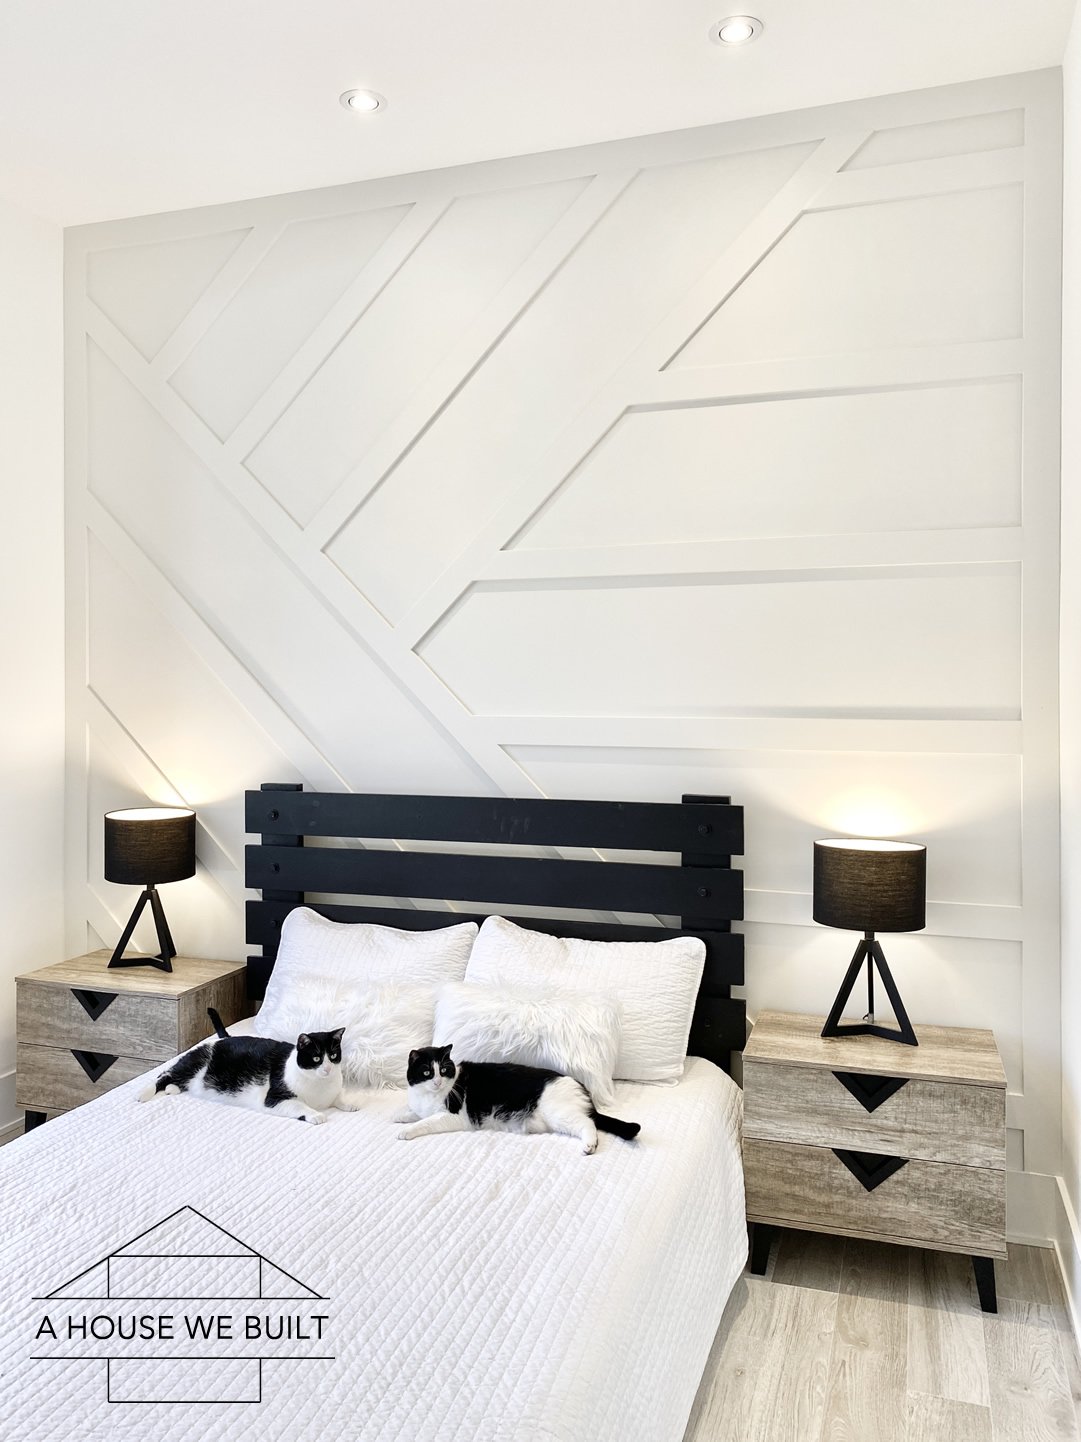
Note regarding the paint color: I've included pictures taken at several different times of day and night, and both in direct sunlight and on a cloudy day so you can really see how different this paint color can look!
Below are finished pictures of this wall. More details on our guest bedroom page

For more sources from our Guest Bedroom, click here.
For more of our DIY tutorials, click here.
To explore the other rooms in our house, click here.
Reader Interactions
How To Create An Accent
Source: https://www.ahousewebuilt.com/how-to-build-a-paneled-accent-wall/
Posted by: smithgert1936.blogspot.com
0 Response to "How To Create An Accent"
Post a Comment