How To Create A Title Page In Premiere Pro
Titles are an important aspect of any video whether they are needed for the introduction, credits, or other information. In Adobe Premiere Pro, you have many ways to add titles to any video, animate them, and make them look the way you want.
At first, the process of creating title graphics in Adobe Premiere may seem confusing, and you might find you run into some roadblocks if you're unsure of what to do. In this article, you'll find instructions for creating new titles and using them within your video, as well as adding some simple effects to create title motion graphics.

How to Create Title Graphics in Adobe Premiere
After opening the project where you'd like to add a title graphic, navigate in the timeline to the area where you want your title graphic to appear.
There are several ways you can create a title.
Method 1 (Old Way)
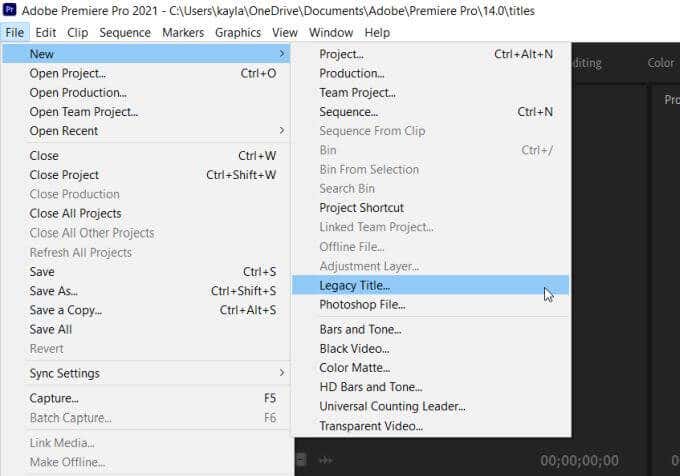
- Go to File > New > Legacy Title. Select OK in the pop-up, then a new window should appear where you can create your title.
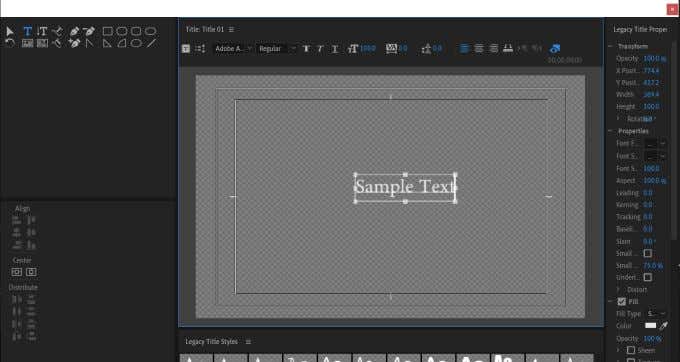
- The text tool should already be selected, and you can click anywhere within the picture to start typing.
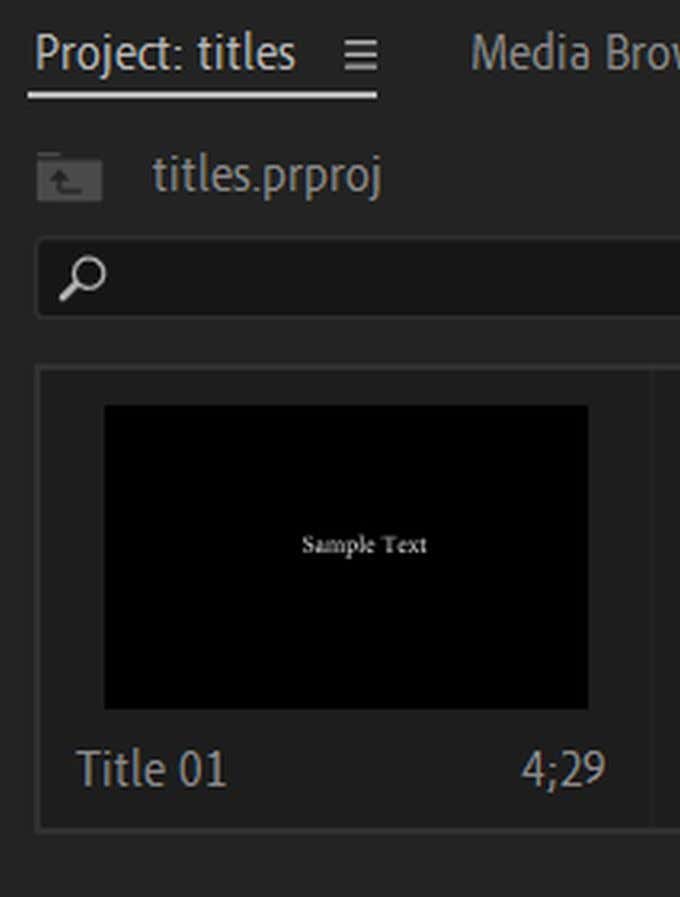
- Once you're done, you can find your title in the Project panel. Drag it into the timeline wherever you want it.
Legacy titles will soon be leaving Premiere Pro, so it's recommended you start using the next method outlined below.
Method 2 (Recommended)
- Select the Type tool from the left side of your toolbar.
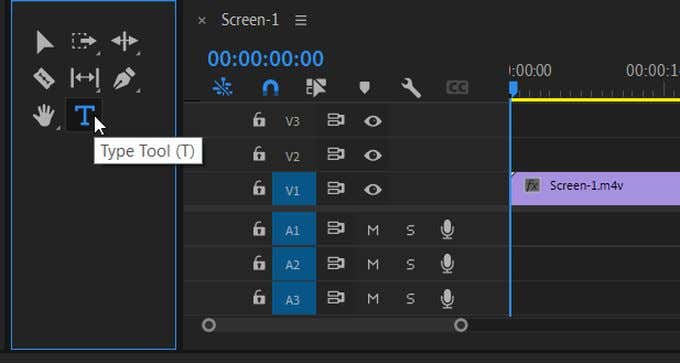
- In the program panel, choose where you want your title to be and click with the Type tool.
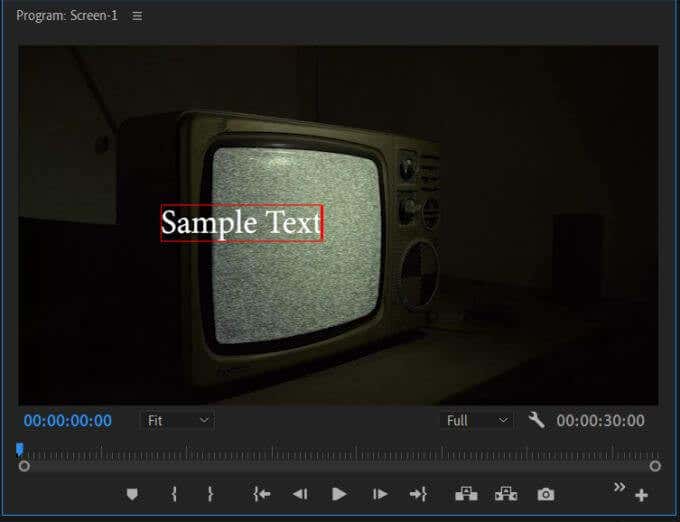
- Type out the title you want to appear. You should also see the Effects Controls panel appear once you have created a title.
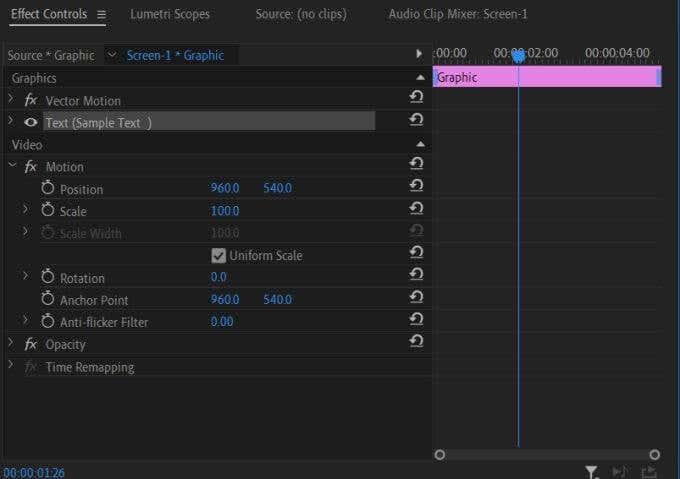
- In the Effects Controls panel, you can change many different aspects of the text such as font, size, color, etc.
Editing Your Titles
If you use method two, there is another way you can edit your title graphics and how they appear within your video in Adobe Premiere. This method makes titles easier to edit once they are inserted into the project.
Follow the steps below to use Premiere's Essential Graphics feature to edit your titles.
- Follow method 2 above to create your title.
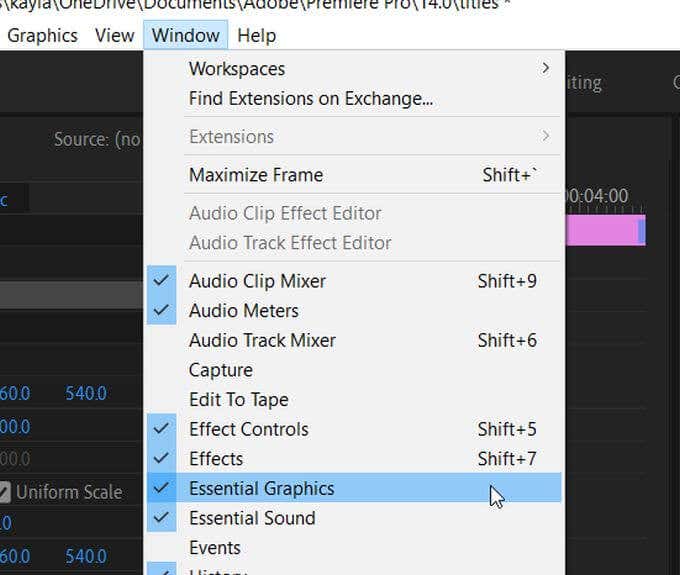
- Go to Window > Essential Graphics. The panel will then appear besides your video.
- Select the Edit option, then select the text layer you have already created. Your editing options will then appear and you can change size, font, color, alignment, and more.
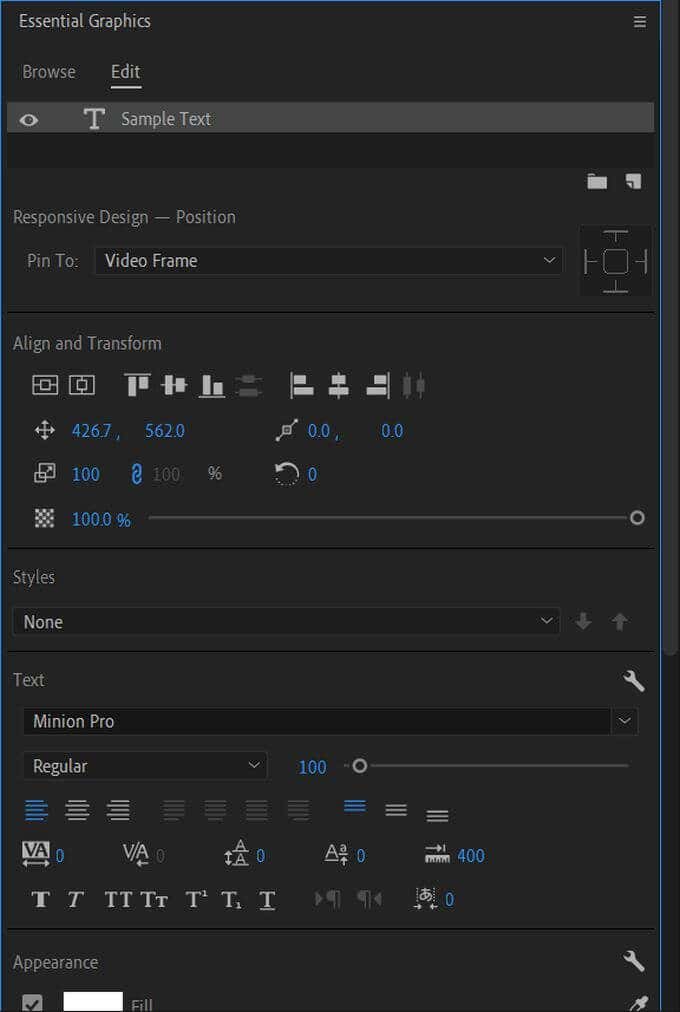
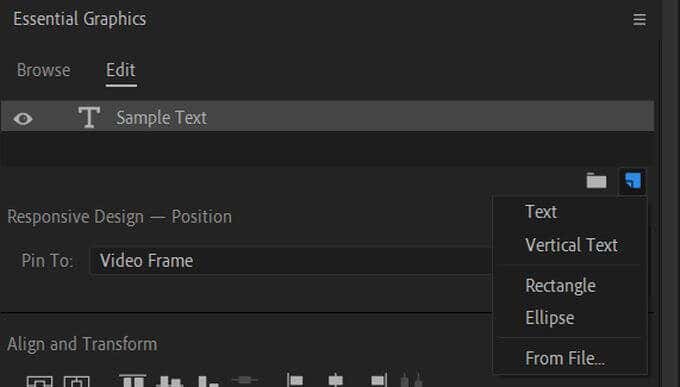
- You can add more text layers if you wish by selecting the paper icon below your listed layer. Click this New Layer icon and select Text or Vertical Text. You can also add shapes this way, such as a rectangle or ellipse.
- You can also select your titles within the program panel to edit their size or position.
Saving Your Title Text Style
You may also want to save a text style you have created for future use. You can do this through the Styles feature.
- Once you've created a text style you like, go to the Styles option and select Create Style.

- Name the style you wish to save.
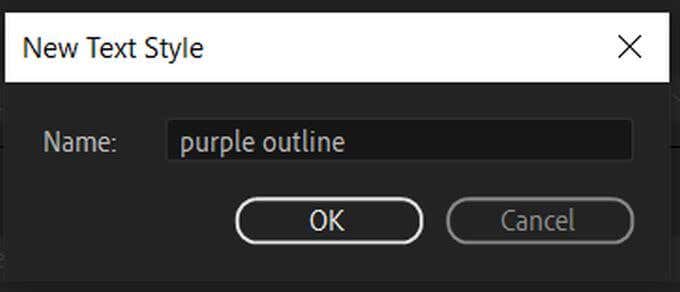
- In the next project you wish to use this text style in, simply go to the Styles dropdown and select it.

Using Title Graphics Templates
Within the Essential Graphics feature, Adobe has also provided some templates you can use to quickly format your text the way you want it. They have many popular types of formats available. Here's how to find and use them.
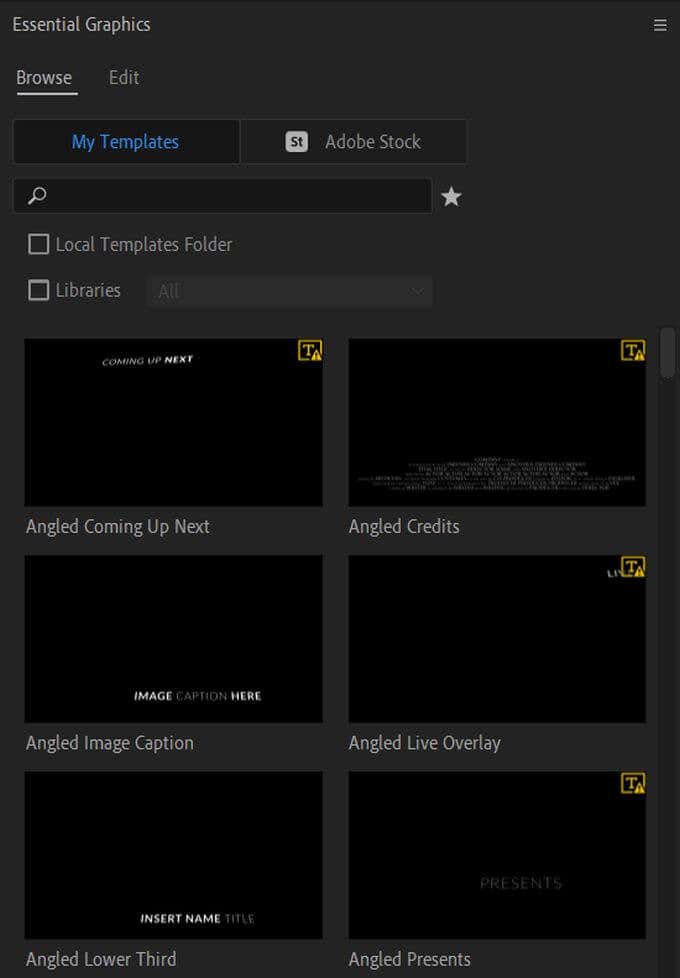
- Open the Essential Graphics panel and select the Browse option.
- Select My Templates below Essential Graphics and choose which type of text format you want to use. Then, click and drag it into your timeline where you want it to appear.
- Select the sample text in the template within your program panel and you can then delete and change the text.
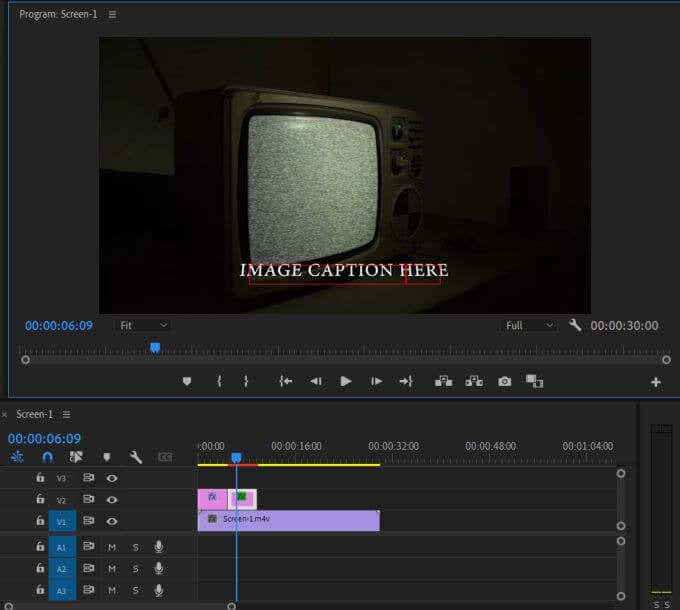
Using these templates makes it easy to create good-looking text relatively quickly. However, you may not find the kind of template you're looking for, or maybe you want to create your own animation for your title. You can do this as well if you want to invest some more time into your title creation.
Creating Title Motion Graphics
Before you start creating motion graphics for your titles in Premiere, you'll want to have an understanding of how keyframes work. Keyframes are points of changing values of certain effects which, when played in your project, will appear as an animation of the effect.
For example, if you have one keyframe on some text where the opacity value is first at 100%, and then another keyframe after it where the opacity is at 0%, your text will animate with this lowering opacity level to appear like it's fading out.
To create your own motion graphics, follow these steps.
- Follow method 2 to create your text in your video. If you want, you can also add any shape layers you wish to use.
- Open the Essential Graphics panel and select the text or shape layer you want to animate.
- Go to the Effects Controls panel, scroll down to the Motion or Opacity dropdown and find an effect you want to animate with your text. This could be scale, position, opacity, etc., or a mixture of them.
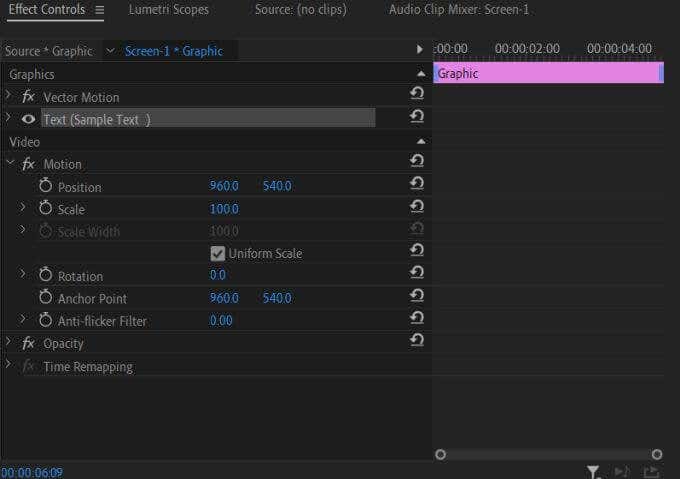
- To animate an effect, set your starting value (how you want your text to appear at first) and click the timer icon (Toggle Animation) to set a keyframe. For example, if you're doing a fade-out with opacity, set the opacity to 100%.

- Move the cursor in the keyframe timeline (which appears right next to Effects Controls) to the next point where you want your text animation to change. Then, set the value where you want the text to end up. Again, for a fade-out, you would now set opacity to 0%.
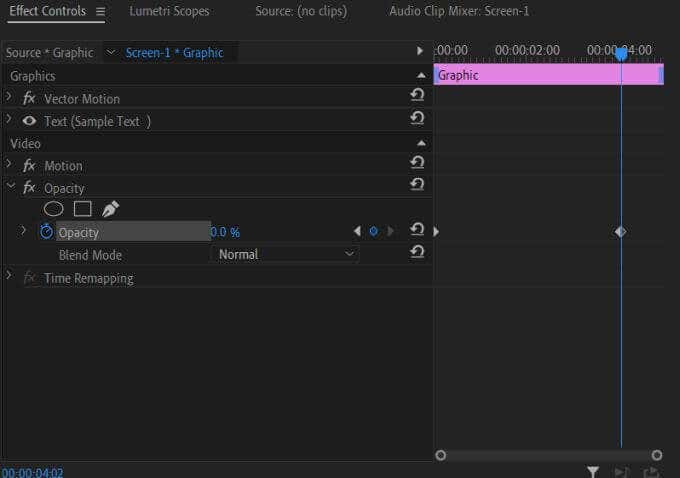
- Play your video to ensure the animation looks the way you want. You can change the speed of the animation by moving keyframes either closer together or further apart.
Once you figure out how it's done, creating simple motion graphics can become very easy and add some great flair to your videos. You can also play around with effects to create some cool looking graphics.
Creating Title Graphics in Premiere Pro
Using Premiere Pro tools, it's easy to make good-looking titles as well as motion graphics for your titles. With a little tinkering with the effects controls, you'll soon create professional-looking title graphics. Premiere Pro is a very powerful editing program for this reason among many others.
Do not share my Personal Information.
How To Create A Title Page In Premiere Pro
Source: https://helpdeskgeek.com/how-to/how-to-create-title-graphics-in-adobe-premiere-pro/
Posted by: smithgert1936.blogspot.com

0 Response to "How To Create A Title Page In Premiere Pro"
Post a Comment